Developing a 3D printable version of Spookie Skull demanded multiple rounds of refining its visual appeal, rigorous testing to ensure parts snap into place, and an unwavering passion throughout the entire production process. From start to finish, Spookie Skull was crafted with a labour of love.
Step 1 - Design an Adorable Cutie Character for 3D Printing
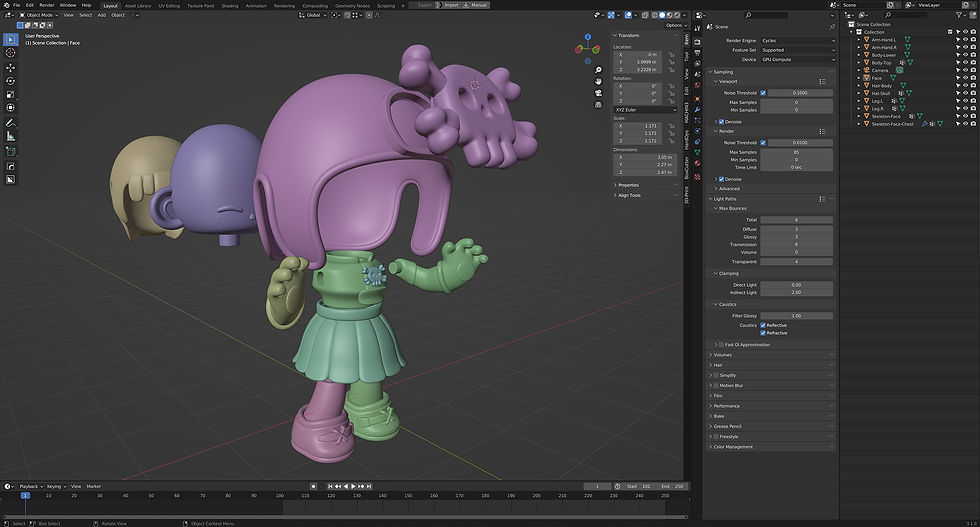
At this stage of the process, I utilise my creative abilities to conceptualise a character that is not only charming but also practical for a physical 3D printing figurine for multiple copies. I start by transforming Spookie from the Imaginary Friends collection into a cute spooky skull theme. Unlike conventional 3D-printed models, I aimed to infuse more intricate details, with layered elements casting highlights and shadows. Therefore, the head, hair, helmet, and skull were made as separate parts, which required careful engineering of joints to achieve the desired appearance. After arriving at a satisfactory design, I proceeded to build the character parts in Blender my go-to 3D application tool, where I meticulously fine-tuned each aspect to ensure it was optimised for 3D printing. Sometimes I can sit at the desk making tweaks for days to get this right.
Step 2 - Setting Up for 3D Print
After finalizing the 3D file, I proceed to lay out its elements in ChituBOX, a 3D printing software that enables me to add necessary supports, hollow out certain areas, and slice the model. Essentially, this is a preparatory step that ensures the 3D model can be printed with optimal results. If executed correctly, this step typically results in a high-quality 3D print that accurately captures the intended design.

Step 3 - 3D Printing the Parts
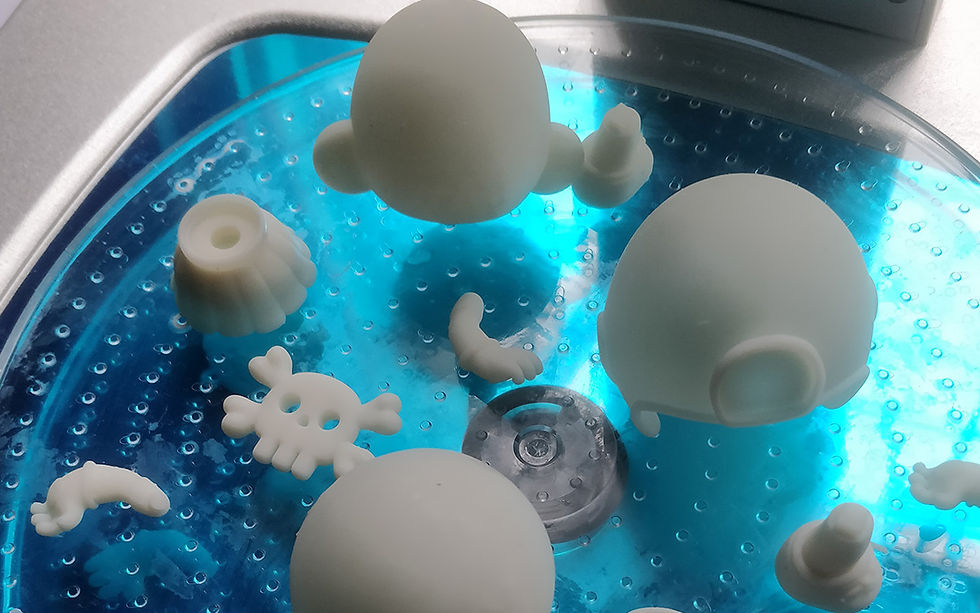
The 3D printing process can get very messy, due to the resin involved, wearing gloves, a mask, and protective gear is essential to ensure safety. Once the resin is shaken and poured into the printer vat, I select the file for printing and allow the machine to work its magic. Despite the small size of the model, it takes around 3 to 4 hours to print. To avoid being exposed to the resin fumes, I often step out of my studio during this time. I quickly pop back into the studio room to monitor the print every 30 minutes for any potential issues. Once the print is complete and if I'm lucky I would only get a few failed prints. For the ones that came out well, it gets put into the cleaning process. From here it takes 2 hours to trim the support from the base, wash them with isopropyl alcohol, allow them to dry, and then cure them in a separate UV machine. Once the resin has hardened it's safe to touch. After this, it's time to clean up the mess in the studio and believe me the studio does sink and get messy. It generally takes about 2 days to dissipate the smell with all the windows opened and the fan extracting the fumes.

Step 4 - Sanding and Refining the Parts
The next process involves sanding the pieces. I use two different grades of sandpaper. Starting first with rough sandpaper to smooth out any bumps, and then switching to the finer grade to achieve a polished finish. After sanding, I dip the pieces into a bucket of water and run each piece with a cloth to remove any excess dust particles. If I notice holes that need patching, I apply putty and repeat the sanding process again.

Step 5 - Painting the Figuring Parts
To prepare the pieces for painting, I apply a white primer spray as a base coat. Then, I carefully hand-paint each part, paying close attention to the intricate details that require a steady hand. If I accidentally make a mistake, resulting in a poor paint application, I remove the paint and start again. This process can be time-consuming, but it's crucial to ensuring the final product looks as close to being polished and professional.

Step 6 - Assembling the Pieces Together
Once I'm satisfied with the painting of each piece, the final step is to assemble them together. The hair and helmet parts that wrap around the head can be a bit tricky to fit without cracking, but I've developed a hack from my countless experiments. I use a hair dryer to temporarily soften the resin, making it easier to slip the parts into place seamlessly. Attaching the other pieces is relatively simple by slotting each connection point together and securing it with super glue. And when something breaks, it hurts. If it is not a joint issue, I often just go back to step 3 in reprinting the parts again and follow through with the process.

Step 6 - The Production Final Stage
At this stage, I lightly spray a layer of matte varnish, I've tried satin and gloss varnish and both didn't look good from past attempts. The matte varnish provides protection to the paint. However, from experience, it's crucial to not spray too much varnish as it can make the paint appear dull. Despite months of testing and encountering many 3D print failures and is far from being perfect, reaching this far is quite an achievement for me. I've managed to utilised the resources I have as an independent artist to finally create my own physical toy figurine. I dream of one day being able to mimic or even collaborate with well-established toy companies such as Popmart, Kidrobot, Mighty Jaxx, or Tokidoki, who predominantly manufacture amazing vinyl toys with large budgets to build on Cutie Quirks.
The Journey
The journey of this process has been very time-consuming and sometimes it's easy to give up. I have placed the production on hold a few times when I had a number of hiccups with the print results and surrounding limitations. I had to recalibrate myself to find a better solution and hence the production has taken a bit longer than expected. Each hurdle I've encountered has served as a valuable learning opportunity, contributing to my understanding of how to expand the Cutie Quirks universe. Although the journey has been challenging, I remain passionate as ever to bring it to fruition. If you've read this far into my ramblings about the process and my journey, I sincerely appreciate your time and patience.
Model Figurine Details
Cutie Quirks - Spookie Skull
Approx Height: 7cm
3D Resin Printed
Hand Painted and Assembled
Designed and Made in Australia
Comments